
Here it is, my first ever home dec. slash DIY post! Everybody Freak Out. Everybody Dance Now.
This first post sort of came to me while in class the other day with a project in my super senior color and design class. I should have taken this class more than a couple years ago, but put it off until now.
Look what I learned.
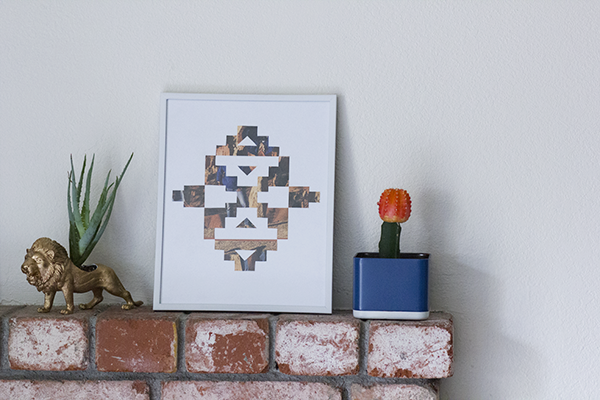
It seems that for almost any of the projects so far I’ve taken an extremely geometric approach to them. We made some notans the other day, basically focusing on positive and negative space, cutting one piece out and glueing it down to reflect the space we just cut out. The results are really awesome, and you can fill an 8×10 frame with just a 4″ square of paper. And it’s practically free.
I mentioned to my friend Anna how cool it would be to cut up some old National Geographics and use those instead of the black paper. I looked through one and found 7 amongst the ruins of others cutting through all the pages.

Yes that man is missing his head. Yes, said head does photobomb the image to the right of it. It’s just the rules and regulations of cutting through an old National Geographic from the 80s. Those three on the right were the final contenders. That one at the top got the frame.
I chose National Geographics because:
a) they’re cheap at thrift stores.
b) they’ve got vibrant colors
& c) the pages are fairly thick so they can hold up to the cutting and the glue.
Go get some. I’ll wait.
Now let’s get started.
Supplies you’ll need:
National Geographic Magazines, or possibly some photographs?(!)
Xacto knife
Cutting mat
pencil
glue stick
optional: paper cutter and graph paper
Side Note: If you have a smart phone and you shop at Michael’s or Joanns and you haven’t downloaded they’re apps, shame on you. Just do it right now. You’ll thank me later when you get your Xacto knife and extra blades for half off.
Now we can really get started.
Flip through and choose a few different pages that have 4×4 sections that float your boat/melt your butter.
Cut out the pages, then cut out the 4×4 squares. Those paper cutters are stellar tools for this.
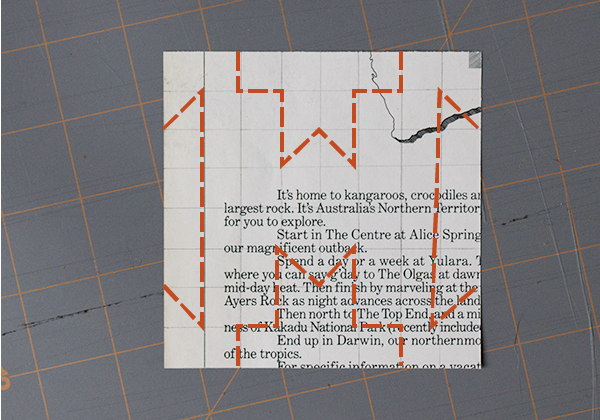
Then do yourself a favor and, using your pencil, lightly draw a 1/2″ grid on the back of the sheets. My solution for making exact matching pieces on opposite sides of the page, plus I think it helps with the design a little bit. If you cannot draw on the back because the paper’s too thin, or there’s an image obstructing the view, try gluing some graph paper onto the back.

Using the guide above, cut where you see the dotted lines, slowly with an Xacto knife.
At this point, you’re probably thinking, I could probably do this in photoshop, or Illustrator. I’ll have you know that’s not as awesome, but yes you probably could.
Once all the cutting is done, you should be able to flip it all over and then rotate the pieces out and match up the corners. Now you’re ready to glue
I used a good glue stick and some white cardstock, but if you wanted to use a different paper then go for it. You could also use any other paper medium instead of the national geographic. Here ar the other two squares, one with the same pattern and the other with a different one.

Steve said he liked the purple one the best, so the cool thing is these can easily be switched up for a rotating notan extravaganza. That should have been the title of this post.
And here for you is the pattern for the one on the left:
I wanna see some more, Steve said it would be cool if they were huge. Somebody do that. Go have fun and make some of these!
Also there’s going to be a little succulent post coming your way within the next couple of weeks. Awesome planting options!!
